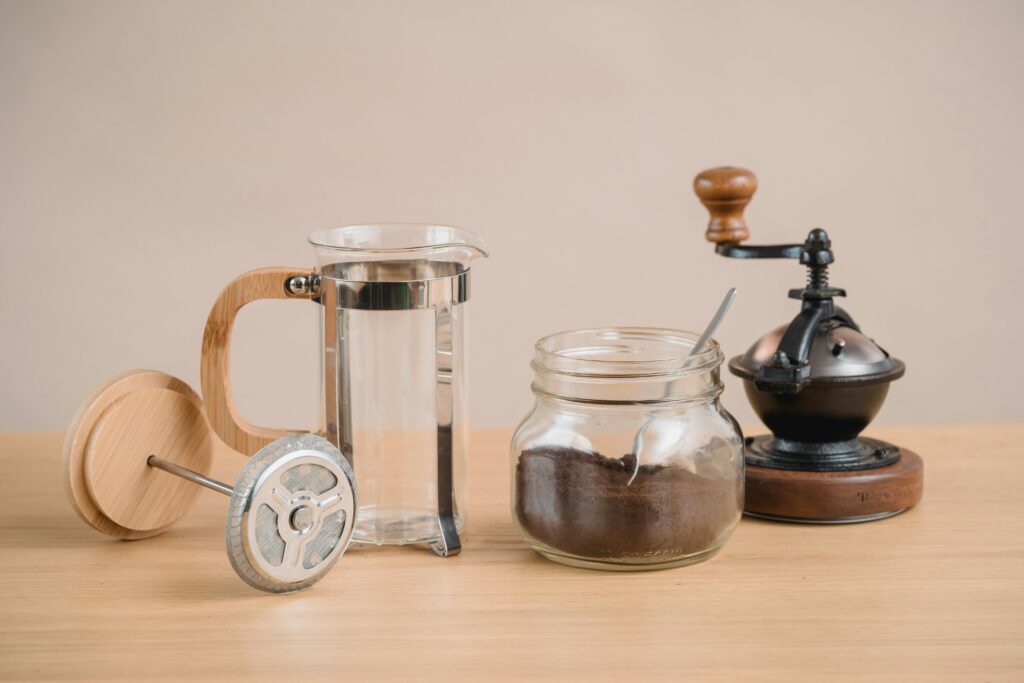
A coffee grinder is one of the most important tools in any coffee lover’s kitchen and one of the most neglected. Cleaning a coffee grinders regularly is not just a matter of hygiene; it directly affects the flavor of every cup. Stale coffee grounds, built-up coffee oil, and residue left inside the grinding chamber can quietly ruin even the finest coffee beans. This comprehensive guide covers everything there is to know about keeping a grinder in peak condition.
The Importance of Cleaning Coffee Grinders for Flavor
Many coffee enthusiasts spend significant time dialing in their grind size settings and sourcing high-quality beans, only to overlook the state of the machine doing the grinding. The reality is that a dirty grinder works against every other effort made to improve a cup of coffee.
Coffee oil buildup is the primary culprit. Every time coffee beans pass through a grinder, the natural oils from those beans coat the burrs, the hopper, and the interior walls of the grinding chamber. Over time, these oils oxidize and turn rancid. Fresh beans ground through a machine coated in old, stale residue will pick up those off-flavors. In this guide, we will explore why Cleaning Coffee Grinders is the most neglected part of a coffee routine.
Beyond flavor, coffee oil buildup introduces friction into the grinding mechanism. This extra friction puts stress on the motor and can accelerate wear on the burrs themselves, ultimately shortening motor longevity. Regular maintenance is, in this sense, as much about protecting an investment as it is about coffee quality.
Understanding the Process of Cleaning Coffee Grinders
Before diving into the cleaning process, it helps to understand the components that need attention. Whether someone owns a conical burr grinder or a flat burr model, the key parts are largely the same.
The Burrs
The burrs are the heart of any quality grinder. There are two main types: conical burr sets, where an inner burr sits inside a cone-shaped outer burr, and flat burr sets, where two parallel rings face each other. Both types work by crushing and cutting beans to a consistent particle size distribution, but they require slightly different approaches to cleaning and burr alignment.
Burrs are commonly made from stainless steel burrs or ceramic burrs. Stainless steel burrs are durable and relatively forgiving during cleaning, while ceramic burrs are more brittle and require extra care. “When it comes to Cleaning Coffee Grinders, focusing on the burrs is crucial for grind consistency.”
The Hopper and Hopper Throat
The removable bean hopper sits atop the grinder and feeds coffee beans into the grinding mechanism via the hopper throat. Coffee oils coat the inside of the hopper over time, and in humid environments, moisture can cause grounds to clump and stick along the hopper throat. These sticky deposits slow the feed of beans and affect dosing consistency.
The Grinding Chamber and Chute
The grinding chamber is where the actual grinding takes place. Ground coffee exits through a chute the channel that directs grounds into a portafilter, dosing cup, or grounds bin. Chute cleaning is one of the most commonly skipped steps in grinder maintenance, yet this narrow channel is a prime location for grounds to pack together and create blockages that affect both grind retention and particle size distribution.
The Adjustment Collar
The adjustment collar controls the distance between the burrs, which in turn determines grind size. Grounds and coffee particles can work their way into the threads of the adjustment collar over time, making it harder to change grind size settings and potentially affecting burr alignment. Keeping this area clean ensures smooth, accurate calibration adjustments.
The Motor
The motor powers the entire grinding mechanism. While it is not directly cleaned in the same way as the burrs or hopper, protecting the motor from excessive friction caused by buildup and from moisture is essential to motor longevity. A clean grinder runs more efficiently, putting less strain on the motor with each use.
How Often Should a Coffee Grinder Be Cleaned?
The right cleaning frequency depends on how heavily the grinder is used and what kind of coffee is being ground. Here’s a practical breakdown:
- Daily use (home espresso): A quick brush away of residue from the grinding chamber and chute should happen after every session. A deeper cleaning process every one to two weeks is ideal.
- Daily use (drip or pour-over): A brush-down every few days and a full clean every two to four weeks keeps things running well.
- Occasional use: Even grinders that sit unused for a week or more should be brushed out before the next use, as oils and grounds can settle and harden during idle periods.
- Commercial or high-volume use: Espresso grinder cleaning protocols in café settings typically involve daily brushing, weekly deeper cleans, and monthly disassembly.
The Tools Needed for Proper Grinder Maintenance
Good maintenance doesn’t require a lot of equipment, but having the right tools makes the process faster and more effective.
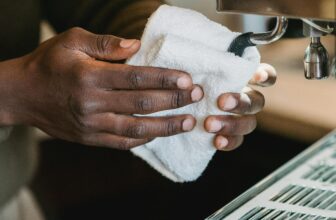
- Cleaning brush: A dedicated cleaning brush ideally a stiff-bristled brush sized for grinder interiors is the most-used tool in any grinder maintenance routine. It’s used to brush away residue from the burrs, grinding chamber, and chute without scratching surfaces.
- Grinder cleaning pellets: These small, dry cleaning tablets are one of the most convenient innovations in grinder care. Grinder cleaning pellets are made from food-safe, absorbent material. They’re run through the grinder like coffee beans, where they absorb coffee oils, loosen stale coffee grounds, and carry residue out through the chute. They’re particularly useful for built-in or less accessible grinders.
- Cleaning tablets: Similar to grinder cleaning pellets, cleaning tablets are designed to be ground through the machine. They work to neutralize odors and lift coffee oil buildup from the burrs and chamber walls.
- Vacuum with narrow attachment: A small vacuum is surprisingly useful for removing loose particles from the grinding chamber and around the burrs, particularly after using a brush.
- Compressed air: A short burst of compressed air can dislodge particles from hard-to-reach spots like the hopper throat and adjustment collar threads.
- Dry microfiber cloth: Useful for wiping down the outer surfaces and the hopper after brushing.
Step-by-Step: The Regular Maintenance Routine
This is the routine that should happen every few days for regular home users, or daily for espresso grinder cleaning in a high-use environment.
- Remove the removable bean hopper. Empty any remaining beans never leave coffee beans sitting in the hopper long-term, as oils from the beans will coat the interior and contribute to coffee oil buildup.
- Brush away residue from the hopper interior using a cleaning brush. Pay particular attention to the hopper throat, where grounds tend to accumulate.
- Access the grinding chamber on most grinders, this means removing the top burr. Brush away residue from the inner walls, the outer burr surface, and around the inner burr.
- Use a vacuum to pull out loosened particles from the grinding chamber. This step significantly reduces the amount of stale coffee grounds left behind.
- Clean the chute. A thin cleaning brush or a folded pipe cleaner works well for chute cleaning, dislodging compacted grounds that can cause clogs and affect grind retention.
- Wipe down the adjustment collar and check that its threads are clear of grounds. This protects the accuracy of future grind size settings and burr alignment.
- Reassemble and run a small amount of inexpensive coffee beans through the grinder sometimes called a purge before grinding for consumption. This clears any remaining residue.
The Deep Cleaning Process: A Complete Disassembly Guide
A thorough deep cleaning process goes further than the daily or weekly routine. It involves disassembly instructions that vary by grinder model, but the general approach applies broadly to most burr grinders.
Step 1: Consult the Disassembly Instructions
Before taking anything apart, it’s worth consulting the manufacturer’s disassembly instructions, either in the manual or online. Some grinders have locking mechanisms or calibration markers that need to be noted before removal of parts. Taking a photo of the adjustment collar position is a simple way to preserve calibration settings before disassembly.
Step 2: Remove and Clean the Burrs
With the grinder unplugged and the hopper removed, the top burr (typically the outer burr on a conical burr grinder) can be lifted or unscrewed from the adjustment collar. On flat burr grinders, there may be additional screws to remove. Once the burrs are out, brush them thoroughly on both sides using a cleaning brush.
This is also a good opportunity to inspect the burrs for signs of wear. Dull or chipped burrs affect particle size distribution and grind quality if the edges look worn, it may be time for replacement rather than cleaning alone.
Step 3: Clean the Grinding Chamber Thoroughly
With the burrs removed, the full interior of the grinding chamber is accessible. Use a brush and vacuum to remove all visible grounds and particles. Look carefully at the walls of the chamber where static electricity tends to cause fine coffee particles to cling these can be stubborn and may require several passes with the brush.
Step 4: Address Coffee Oil Buildup
Coffee oil residue on the burrs and chamber walls has a waxy, brownish appearance. A dry brush removes some of it, but for heavier buildup, grinder cleaning pellets are highly effective. Run a dose of pellets through the reassembled grinder, then follow with a purge of inexpensive beans before returning to regular use. Removing rancid oils is the main goal of Cleaning Coffee Grinders regularly.
An important note: avoid water wash on the burrs and motor components. Moisture inside a grinder particularly around the motor and the inner burr housing can cause corrosion and damage to both stainless steel burrs and ceramic burrs. Only components explicitly rated as dishwasher or water-safe by the manufacturer should be rinsed.
Step 5: Check Burr Alignment After Reassembly
After reassembling the grinder, it’s worth checking burr alignment before resuming normal use. Misaligned burrs affect particle size distribution and can introduce uneven extraction into every cup. Many grinders allow for micro-adjustment of alignment the manufacturer’s guidance is the best reference for this process.
Step 6: Recalibrate Grind Size Settings
If the adjustment collar was disturbed during disassembly, grind size settings will need to be recalibrated. Start from the grinder’s zero point (where the burrs just touch), then dial back to the desired setting. For espresso grinder cleaning in particular, this recalibration step is essential even small changes to grind size have a significant impact on espresso extraction.
Grinder Cleaning Pellets and Cleaning Tablets: How and When to Use Them
Grinder cleaning pellets and cleaning tablets have become a popular shortcut in grinder maintenance and for good reason. They simplify the removal of coffee oil buildup and stale coffee grounds from areas that are hard to reach with a brush alone.
To use them, simply pour the recommended dose of pellets or tablets through the grinder as if grinding coffee beans. The pellets grind down quickly, absorbing oils and carrying fine residue out through the chute. After running pellets, it’s important to purge the grinder with a small amount of actual coffee beans before making a cup any tablet residue left in the grinding chamber or chute will otherwise end up in the brew.
These products are particularly useful for espresso grinder cleaning between full disassembly sessions, for grinders where the burrs are not easily removable, and for café environments where thorough daily disassembly isn’t practical. They do not replace mechanical cleaning with a brush, but they’re a genuinely effective complement to it.
Managing Static Electricity in Coffee Grinders
Static electricity is one of the more frustrating aspects of grinding coffee, especially in dry climates or during winter months. Static causes fine coffee particles to cling to the interior of the grinding chamber, the chute, and even the grounds bin leading to mess, inconsistent dosing, and higher grind retention.
A few practical strategies help manage static:
- The Ross Droplet Technique (RDT): Adding a tiny amount of moisture literally a single drop of water to coffee beans just before grinding significantly reduces static electricity. This small amount of moisture doesn’t affect grind quality but dramatically reduces particle clinging inside the chamber.
- Anti-static grounds bins: Some aftermarket accessories are specifically designed to reduce static build-up during grinding. These can be especially helpful for espresso grinder cleaning routines where dosing precision matters.
- Consistent cleaning: Keeping the grinding chamber and chute clean reduces the surface area where static-charged particles can accumulate. Regular chute cleaning is particularly effective.
- Humidity awareness: In very dry environments, a small room humidifier near the grinding area can make a noticeable difference in static electricity levels.
Burr Seasoning: What It Is and Why It Matters
Burr seasoning refers to the break-in period that new burrs go through during their first hours of use. Fresh burrs whether stainless steel burrs or ceramic burrs have microscopic manufacturing imperfections on their surfaces. As coffee beans pass through them in those early sessions, these imperfections wear down and the burrs settle into their most consistent grinding state.
During the burr seasoning period, the particle size distribution from the grinder may be slightly less consistent than it will be once the burrs are fully broken in. Some grinder enthusiasts deliberately run inexpensive beans through a new grinder for several hours specifically to accelerate this seasoning process before using it for espresso or specialty coffee.
It’s worth noting that burr seasoning also applies after a cleaning session that involves any physical abrasion of the burr surface. A freshly cleaned set of burrs may benefit from a short purge of practice beans before resuming high-stakes grinding.
Low Grind Retention: Why It Matters and How Cleanliness Affects It
Low grind retention is a desirable characteristic in a coffee grinder it means the machine is not holding onto significant amounts of ground coffee between doses. Grinders with high retention leave stale grounds sitting in the chamber and chute, which mix with fresh grounds every time the grinder is used.
Cleaning plays a direct role in achieving and maintaining low grind retention. When the chute is blocked with compacted grounds, or when the grinding chamber is coated in old residue, fresh grounds are more likely to stick and accumulate. Regular chute cleaning and maintaining clear pathways through the grinding chamber and outer burr assembly keeps retention as low as the grinder’s design allows.
For espresso preparation especially, where dosing precision is critical, a clean grinder with genuinely low grind retention produces far more consistent results than the same grinder would if left uncleaned.
Avoiding Common Grinder Cleaning Mistakes
Even well-intentioned maintenance can go wrong. Here are the most common mistakes and how to avoid them:
- Using water on the burrs or motor: Moisture is one of the greatest threats to grinder longevity. Avoid water wash on any internal component unless the manufacturer explicitly states it is safe. Water causes corrosion on metal burrs and can damage the motor.
- Forgetting the adjustment collar: Grounds work into the collar threads over time. Neglecting this area leads to stiff adjustments and can eventually affect burr alignment and calibration accuracy.
- Skipping the purge after cleaning: Running grinder cleaning pellets or cleaning tablets without following up with a purge of real beans will leave tablet residue in the chute and grinding chamber, introducing off-flavors into the next brew.
- Ignoring the hopper: The removable bean hopper is often the most visually obvious source of coffee oil buildup, yet it’s frequently overlooked. A quick wipe-down with a dry cloth after each removal makes a significant difference.
- Over-cleaning with abrasive tools: Burrs are precisely engineered components. Using abrasive pads or metal tools to scrub them can alter their geometry, affecting particle size distribution and the quality of every grind thereafter.
- Leaving beans in the hopper overnight: Coffee beans release moisture and oils continuously. Leaving them in the hopper accelerates the buildup of residue along the hopper throat and grinding chamber walls. Dosing only what’s needed for each session is the best practice.
Special Considerations for Espresso Grinder Cleaning
Espresso grinder cleaning deserves particular attention because espresso is far more sensitive to grinder cleanliness than drip or pour-over brewing. The fine grind size used for espresso means that even tiny amounts of stale residue or oil contamination can produce noticeably bitter, flat, or off-tasting shots.
Espresso grinders also tend to accumulate grounds more aggressively in the chute and grinding chamber due to the fine particle size and the tendency of fine particles to compact together. This compaction is a significant contributor to both high grind retention and the persistent static electricity issues common with espresso grinding.
For those using a conical burr grinder for espresso, the inner burr is particularly prone to buildup in the grooves between the grinding ridges. A brush with firm, narrow bristles is the most effective tool for working grounds out of these grooves. Grinder cleaning pellets are also highly recommended as part of a weekly espresso grinder cleaning routine, supplementing but not replacing mechanical brushing.
Maintenance Tips for Longer Grinder Life
Beyond cleaning, a few general maintenance habits significantly extend the working life of a coffee grinder:
- Avoid grinding very oily or dark-roasted beans frequently: Dark roasted coffee beans release significantly more oils than lighter roasts. If oily beans are a regular choice, cleaning frequency should increase accordingly to prevent accelerated coffee oil buildup.
- Never grind non-coffee items: Some people run rice through their grinder in the belief it cleans the burrs this is a myth and can damage both stainless steel burrs and ceramic burrs. Use dedicated grinder cleaning pellets instead.
- Store the grinder with an empty hopper: Leaving coffee beans in the hopper between uses contributes to residue and moisture accumulation. Store beans separately in an airtight container.
- Inspect burrs periodically for wear: Even with excellent maintenance, burrs eventually wear down. Flat burrs and conical burr sets alike have a finite lifespan. Monitoring for changes in particle size distribution or grind consistency is the best early indicator that replacement is approaching.
- Check the adjustment collar periodically: Even when not performing a deep clean, a quick check of the adjustment collar threads for buildup helps maintain smooth calibration and accurate grind size settings.
Blade Grinders: A Note on Cleaning
While this guide is focused primarily on burr grinders, it’s worth briefly addressing blade grinders. A blade grinder uses a spinning blade similar to a blender to chop coffee beans rather than grind them. While blade grinders are less precise than burr models and produce uneven particle size distribution, they still require regular cleaning to avoid coffee oil buildup and the transfer of stale residue into fresh grounds.
For blade grinders, the cleaning process is simpler: unplug the unit, use a cleaning brush or dry cloth to remove grounds and residue from the blade and chamber walls, and avoid water wash on the motor housing. Grinder cleaning pellets can be used in blade grinders as well and are an effective way to address oils that a brush alone doesn’t reach.
Final Thoughts: Clean Coffee Grinders, Better Coffee
The connection between a clean coffee grinder and a genuinely great cup of coffee is direct and measurable. Coffee oil buildup, stale coffee grounds lodged in the chute, misaligned burrs, and neglected adjustment collar threads all quietly degrade the grind quality that makes the difference between an ordinary cup and a truly enjoyable one.
The good news is that grinder maintenance doesn’t have to be time-consuming or complicated. With a quality cleaning brush, a supply of grinder cleaning pellets, and a simple routine built around regular brushing and periodic deep cleaning, any coffee grinder from an entry-level conical burr model to a high-end flat burr espresso grinder can stay in excellent condition for years.
Low grind retention, consistent particle size distribution, accurate grind size settings, and a grinder free of rancid oils and stale grounds all start with one straightforward habit: cleaning the grinder regularly. That single habit pays dividends in every cup.
Pro Tip: Keep a small cleaning brush right next to the grinder as a visual reminder. The easier the brush is to reach, the more likely regular maintenance will actually happen.